Pages

Saturday 30 October 2010


This is my favorite eye combo that i have been wearing everyday! MAC's Honey Lust is a luster so it is very sparkly but when on the lid it doesn't look like a big mess if you apply it right. A gorgeous golden honey shimmer color. A small amount of this will go far. This is a great all over eye color and it is very pigmented like most of MAC's eye shadows. Next is MAC's Shroom which is a satin. This is a great base and highlight, in the picture it is coming out very yellowish but in real life and when applied onto the lid it is a whitish color. It is very smooth and a versatile product. This is also a great highlight for your cheekbones. Next is Nyx's volcano, which is a chocolate brown. It is a great crease and outer half color and is great for a neutral eye. It is pigmented but you need to apply a bit more of this to achieve the same amount of color as the MAC eye shadows. You can wear this as a all over lid color but only if you apply a small amount other wise it would look to dark. So first i prime my eyes and then i use a small flat eyeshadow brush and pat on shroom along my lid. Then i get honey lust and get a big flat shadow brush and pat it on the outer half of my lid. Then i use MAC 217 blending brush and blend in volcano into my crease and outer half of the lid. Then i blend colors all together but not too much so that they make all one color. Then i dust honey lust on the outer half just to give some more shimmer. Then i put shroom as my highlight on my brown bone and inner corner of the eye. I love this combo, its a great autumn look.


So this must be one of the most raved about items of MAC on youtube, so of course i really wanted to try it out but it seemed a little expensive. So when i was away on holiday to the LA, i thought i might as well get it seeing as everybody loves it. And now i know why, its amazing and i mean AMAZING!. Its a powder so you can wear it over your foundation but what i like to do is to wear it as my foundation, because i like a light coverage. If you wanted a fuller thicker coverage then just use foundation because this is not a foundation. But i wear this instead of a foundation. I got medium deep which is a bit darker than my skin tone but i wanted something that would give me a little color. I'm not sure about the exact prices but if you want to know go and look on the MAC cosmetics website. I use a kabuki to buff it onto my face and down my neck and i use circular motions so it glides on to my face nicely. It is honestly worth the money and it also lasts for ages. I got mine in summer and there is still loads left and i apply it like twice everyday! Remember to check out - http://www.maccosmetics.co.uk/


I just brought this leather jacket with faux fur inside the hood. This isn't the right picture because i couldn't find one but this one looks most similar, just go to their website to find the right picture. I have been wanting a jacket like this for ages and seeing as it is now autumn and coming up to winter i will be wearing it all the time. At £34.99, its a great investment, you can wear it to go out at night or even during the day, it will go with anything, skinny jeans, leggings. I love it and especially because its got a hood it will keep you warm and dry from rain. It comes up to about you hips, the only thing annoying about it and what i find with most New Look items are that you have to go up one size bigger than what you actually are because they are really tight otherwise, so always try your size and the size above just in case. It only comes in dark chocolate brown but they have other styles which are sort of the same with the faux fur but different colors. Just found out that on their website it says that they have reduced it to £27.99, not sure if that is the same in store because i have only just brought it today and in the UK its only a couple of pounds delivery charge so all together its cheaper than buying in store, wish i would of known that, but oh well, i thought i'd tell you :)


So when i first heard about MACs new collection A Tartan Tale, i was really excited to go and find out more about it. So the only real disappointment was the packaging, i don't like it i think it looks really ugly and not my style (just my opinion), but i do have to say the products look amazing! They are also re promoting some old limited edition items, so if you missed out on them then be sure to check out this collection. Some of the products that are in this collection are eye pallets, dazzle glass', lip kits, face kits, lash kits, mineralize kits, pigments and glitters and the list goes on. The blushes and shadows have a plaid style which is really fun and cool, something a little different to what MAC normally does. This is MACs holiday collection, which is going to be fabulous and amazing as MACs holiday collections are always like In the US its being launched on the 28th October 2010 and in the UK the beginning of November.


I just recently purchased these River Island boots. I absolutely love them, there black suede with cream faux fur inside, they keep you feet really warm. They have got a little wedge heel, but they are really easy to walk in and they don't hurt your feet at the end of the day. They are the type of shoe that you can wear in the day, for work and to go out as well. I wore them today with black leggings and a brownish cream jumper and it looked really cute, to go to work in. If i were to wear them out, which i will i would probably wear them with black skinny jeans and a cute white ruffle top. They're £39.99, which are a really good price for a shoe that i am always going to wear because i can wear them with anything!

Picture from http://www.riverisland.com/Online/women/shoes--boots/boots/black-heeled-hiking-boot-592608


The one product i regret buying this last month was MeMeMe's highlight called Beat the Blues, which is a dupe for benefits high beam highlight. I don't like this highlight, it is a gorgeous color in the bottle and when you swatch but when you actually put it onto your skin and rub it in, it disappears and there is no highlight to your face. I think that it probably doesn't work on my fair skin tone, but if you had a more tan, darker skin tone then it would probably be good on you because it is more of a golden highlight.

Grey Nails ?


I recently saw an article (cant remember what magazine it was from), and it was talking about how the new color grey for you nails. First i was hesitant to purchase a grey nail polish just in case it didn't look good on me but i saw this picture of Lauren Conrad with gorgeous grey nails and instantly i had to get one. I purchased one from BarryM which is my favorite nail polish brand, a light grey nail polish, i didn't get a dark grey because i thought that it wouldn't compliment my hair color. I have tried it out and i love it, its a sort of in between grey that doesn't look to gothic and that it doesn't make your nails look as though they are dead!

Sleek Palettes :)


I absolutely love this palette. I brought the original one, they have other ones called storm, sunset, acid and a limited edition one called circus.
They are really pigmented, they are shimmery but when on your eye lid they look really good and not shimmery.
It retails at £5.99 at super drug, which is a really good price for 12 eye shadows which are highly pigmented.
If your think one eyeshadow from MAC is £11.50, well your getting 12 eye shadows which are pigmented like MAC eye shadows for less than 1 MAC eyeshadow :)


Wednesday 21 July 2010

Nail tutorial & why we havent been blogging !

Heyy everyone, so we just first want to say why we haven't been making any blogs for the past 4 weeks. You can watch our videos on our channel on youtube (candyflossbeauty10).
The first week we had a week of exams at our school that we really needed to study hard for which meant staying up late every night to revise. Then the next 2 weeks after that we were away to a different country with our school. Finally the last week we were resting and recovering from our trip with our school. Now we are back making videos on youtube and blogging on here :)


So now to the tutorial -


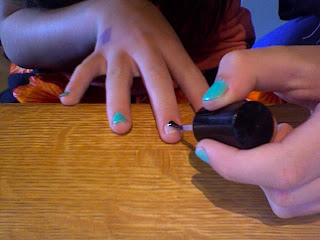
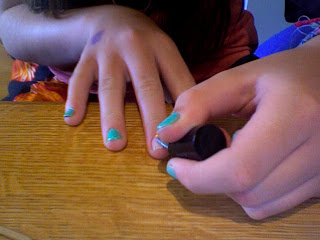
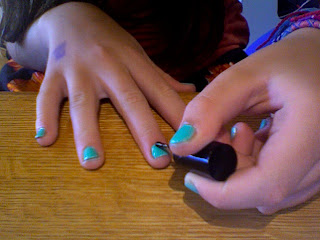
First off I washed my hands with warm water and soap and thoroughly dried them. Next I took of any excess nail polish that was already on my nails with nail polish remover and a cotton pad.


Next I used a nail treatment called Revivanail and i put one coat of it on my nails and then left to dry for about 30 seconds because it is very quick at drying. This is for nails that are slow growing, week or small. You can use this underneath your nail polish, just as a polish or over the top of a nail polish, you use this everyday for 7 days and the result is amazing, it makes your nails stronger and longer.


After that I used a cuticle massage cream and i use Sally Hansen Cuticle Massage Cream, so that i could push back my cuticles. So i placed a little bit of the cream on my cuticles and used a cuticle stick to push them back. Do try to push your cuticles back because it makes them appear longer and it is healthy for your nails. You should always use a cuticle cream when pushing back your cuticles because it it easier and it does not damage the cuticle.


Then I apply a base coat and I use Seche Base ridge filling coat. This is a 2 in 1 product, it not only acts as a base coat but it does fill in any ridges or marks on your nails. It does have a slight color and sheen to it but this is good because if you wanted to wear it on its own then you can because it gives off a nice color and also that color doesn't come through the nail polish you put on top.


So after that I applied the first coat of BarryM nail paint in 304 Green Mint which is a gorgeous green that will suit short or long nails. It needs two coats so after a minute or so I apply my second coat. I do one swipe down the middle and then one either side.


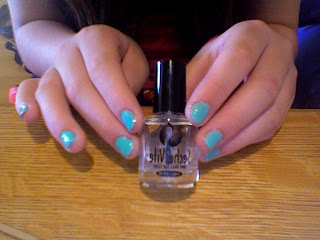
Finally I applied a top coat and I used Seche Vite dry fast top coat. I waited a couple of minutes before I applied this top coat over my nail polish in order of it not smudging or smearing. This dried in a number of seconds, hence why it is called 'dry fast base coat'.


Okaii so this is what my nails look like at the end and also here are all the products I used on my nails.


Thanks for reading,
Candyflossbeauty10 :)

Wednesday 26 May 2010

How to paint the ends of your make up brushes!

Okay, so i decided to paint the ends of my makeup brushes yesterday, and this is what they turned out like: So cute, i love them!

So now, im going to do a mini tutorial of how to paint the ends of your makeup brushes!


Okay so first get your brush, you can do any brush you want: NOTICE: My brush already has the end of it painted, as i painted all my brushes!


Then you get cello-tape:

And then you cellotape near the end of the brush:


Then choose your own nail varnish. You can choose whatever colour you want. I have chosen bright pink!


Then start to paint the end of the brush, and it doesn't matter if you go on the cellotape! Thats why you have it there, so you can make a nice neat line around the brush, this is what it should look like when you are done:


Now take the brush and place it at then end of a table, or a hand towel, so the nail varnish doesn't smudge and leave it to dry.


Then once the brush is dry, take the cellotape off really carefully, and you might notice some of the tape might take a little bit of the varnish off the brush. But it doesn't matter, it still looks cute! And there you have it, your own unique brush!


So i have painted all my brushes and this is what they all look like! :)


I even painted my Kabukis! aw :)


I hoped this helped :D

More subscribers!

Hey!

Just to let you know, when we get to 100 subs, we are holding a hugeee contest!
So we firstly want to say thankyou so much to our 54 Subscribers, we appreciate it so much. But we really need to get more, so we can do this amazing competition!
And we want to thank one of our amazing subscribers so.. thankyou...

Blondegenius94!- Thankyou so much! Your are an amazing subscriber, you have commented on soo many videos, and you always say such nice things. And we wanted to say thankyou! :)

So whoever is looking at our blog now! Please go onto our Youtube channel. http://www.youtube.com/user/CandyflossBeauty10

And subscribe and comment our videos!

Thankyou so much guys! :)